From Couch to Certification: How to Get CPR Certified in 5 Easy Steps
From Couch to Certification: How to Get CPR Certified in 5 Easy Steps
Imagine this: You’re enjoying a lazy Sunday afternoon, scrolling through your favorite shows, when suddenly a thought pops into your head—Would I know what to do if someone around me needed CPR? It’s a sobering question, but the answer can be a lifesaving one. Learning how to get CPR certified is easier and more accessible than you might think. In fact, you can go from binge-watching your favorite series to being a certified lifesaver in just five easy steps. Let’s break it down!
Table of contents
Why CPR Certification Matters
Cardiopulmonary resuscitation (CPR) is a critical skill that can double or even triple a person’s chance of survival after cardiac arrest. According to the American Heart Association (AHA), over 350,000 cardiac arrests happen outside of hospitals in the U.S. every year. That means a family member, coworker, or stranger might one day depend on you to keep them alive until emergency services arrive. CPR certification ensures you have the knowledge and confidence to take action in an emergency.
Whether you’re a parent, teacher, fitness trainer, or just a concerned community member, learning how to get CPR certified is one of the most valuable investments you can make. And the best part? It’s more convenient than ever to get started. Let’s dive into the five steps that can take you from the comfort of your couch to certified CPR hero status.
Step 1: Choose the Right Certification Provider
The first step in getting CPR certified is selecting a reputable certification provider. Not all CPR certifications are created equal. When choosing a course, make sure it’s recognized by reputable organizations like the American Heart Association (AHA), the American Red Cross, or the National Safety Council.
Consider the following factors:
- Accreditation: Ensure the course is nationally recognized and accepted by employers and institutions.
- Certification Type: Do you need Basic Life Support (BLS) for healthcare settings or a standard CPR/AED course for the general public?
- Format: Do you prefer in-person, online, or blended learning (a mix of both)?
Once you’ve found a provider that meets your needs, you’re ready to enroll and get started on your journey.
Step 2: Sign Up and Schedule Your Course
Next, register for a CPR certification course. Many providers offer flexible scheduling options, so you can pick a time that fits into your life. If you’re wondering how to get CPR certified without disrupting your routine, look for online or hybrid courses that let you learn the material at your own pace and attend a short in-person skills session.
For example, an online CPR course typically includes interactive modules, videos, and quizzes that you can complete from your laptop, tablet, or even smartphone. After completing the online portion, you’ll usually schedule a hands-on session with a certified instructor to demonstrate your skills in person.
Pro Tip: If you’re taking the course for work, check with your employer to see if they cover the cost or have preferred training partners.
Step 3: Complete the Coursework
Once your course is scheduled, it’s time to hit the (virtual or real) books! During your CPR certification course, you’ll learn how to:
- Recognize the signs of cardiac arrest
- Perform high-quality chest compressions
- Provide rescue breaths
- Use an automated external defibrillator (AED)
- Assist choking victims
- Respond to special situations, like infant or child emergencies
Don’t worry if you’re not a medical expert—these courses are designed to be approachable and practical. They use videos, step-by-step guides, and real-world scenarios to build your confidence.
If you’re taking an online course, be sure to complete all modules and quizzes before your in-person session. And if you’re doing a traditional in-person class, come prepared with questions, a notebook, and a willingness to practice!
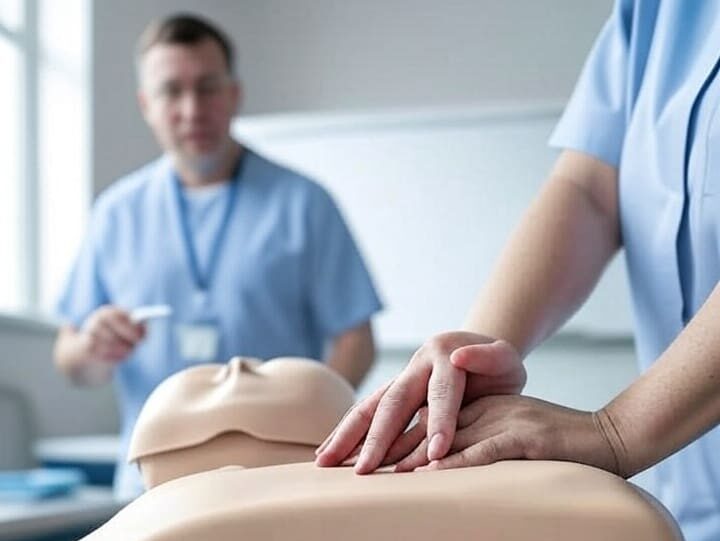
Step 4: Pass the Skills Check
The hands-on skills check is the heart of CPR certification. This is where you’ll demonstrate your ability to perform CPR on manikins and use an AED. Don’t stress—your instructor is there to help, not to intimidate you. They’ll guide you through proper techniques and give you constructive feedback so you feel confident in an actual emergency.
During this session, you’ll likely practice:
- The correct hand placement and compression depth for adults, children, and infants
- Rescue breathing techniques, including using a barrier device
- Proper use of an AED
- How to respond as part of a team in a multi-responder scenario
Once you demonstrate your skills, you’ll receive your official CPR certification card, often valid for two years. Congratulations! You’re officially certified.
Step 5: Keep Your Skills Fresh and Renew Your Certification
Getting certified is a huge achievement, but it’s important to keep your skills sharp. CPR guidelines are updated every five years based on the latest research, so staying up to date ensures you’re using the most effective techniques.
Here are a few tips for staying CPR-ready:
- Renew on Time: Most certifications last for two years. Set a reminder on your calendar so you don’t let it lapse.
- Practice Regularly: Some organizations offer refresher sessions or practice manikins so you can stay confident.
- Stay Informed: Follow reputable sources like the AHA for the latest CPR news, techniques, and updates.
- Get Involved: Join community health events or volunteer to teach CPR in your local area—it’s a great way to stay engaged and help others.
Be the Lifesaver Someone Might Need
Learning how to get CPR certified isn’t just about checking a box on a to-do list. It’s about becoming someone who can make a difference in a life-or-death situation. By following these five simple steps—choosing the right provider, signing up, completing the coursework, passing the skills check, and staying certified—you’ll be prepared to act when it matters most.
So, what are you waiting for? Take a break from the couch, sign up for a CPR course, and become the hero your community needs. Your future self—and maybe even a stranger in need—will thank you.
Chief editor of Side-Line – which basically means I spend my days wading through a relentless flood of press releases from labels, artists, DJs, and zealous correspondents. My job? Strip out the promo nonsense, verify what’s actually real, and decide which stories make the cut and which get tossed into the digital void. Outside the news filter bubble, I’m all in for quality sushi and helping raise funds for Ukraine’s ongoing fight against the modern-day axis of evil.
Since you’re here …
… we have a small favour to ask. More people are reading Side-Line Magazine than ever but advertising revenues across the media are falling fast. Unlike many news organisations, we haven’t put up a paywall – we want to keep our journalism as open as we can - and we refuse to add annoying advertising. So you can see why we need to ask for your help.
Side-Line’s independent journalism takes a lot of time, money and hard work to produce. But we do it because we want to push the artists we like and who are equally fighting to survive.
If everyone who reads our reporting, who likes it, helps fund it, our future would be much more secure. For as little as 5 US$, you can support Side-Line Magazine – and it only takes a minute. Thank you.
The donations are safely powered by Paypal.


